Go to People → Checklists and click New Checklist.
2
Pick the audience
Choose Staff if people complete it themselves on the portal, or Administrative if an Admin completes it for them. You can’t change this later.
3
Assign it to groups and roles
Under Assigned Groups / Roles, pick who gets it. You can pick several and change them later.
4
Name it and create it
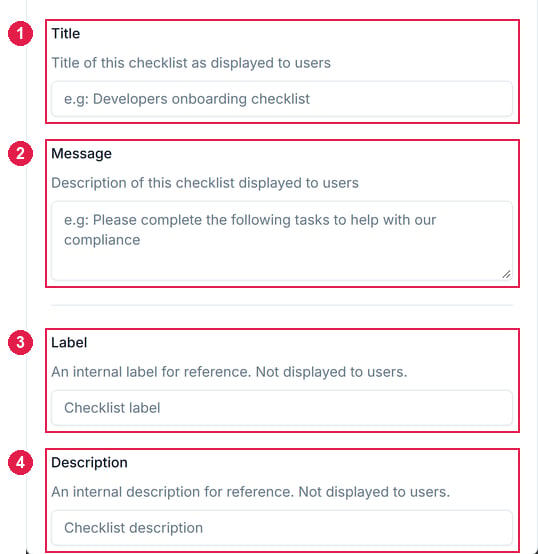
Fill in all 4 name fields for a Staff checklist, or just Label and Description for an Administrative one. Then click Create checklist, and it opens in its editor as a Draft.
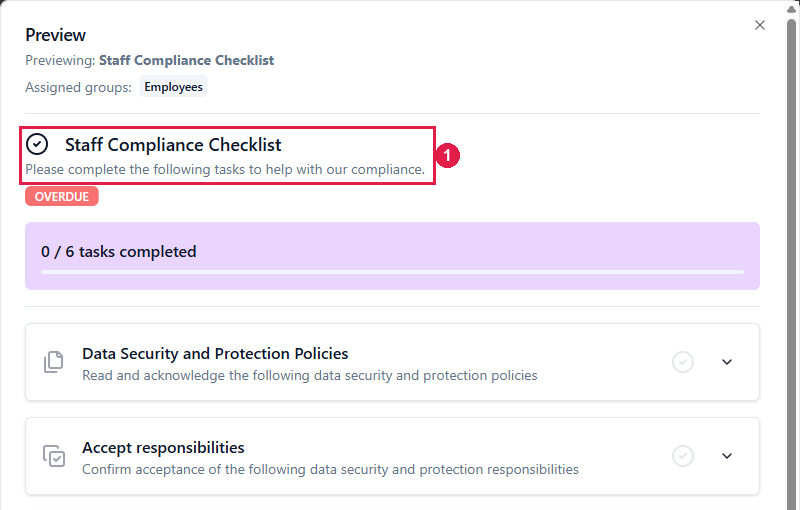
1 Title and 2 Message are shown to the people it's assigned to. 3 Label and 4 Description are internal only.
5
Add its items
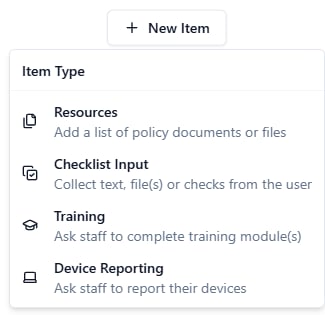
Under Checklist Items, click New Item, pick a type and set it up.
The item types a Staff checklist offers.
An Administrative checklist offers only Checklist Input and Device Reporting, since an Admin fills them in for the person.
6
Preview, then publish
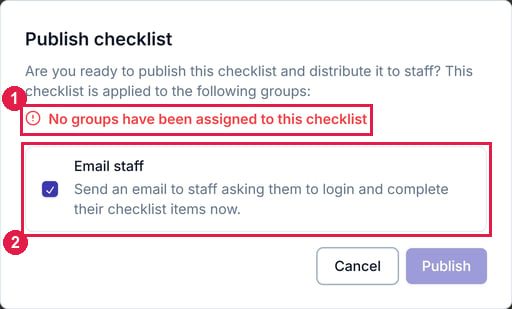
Click Preview to check it, then Publish. The dialog lists the groups and roles it goes to, and Email staff, ticked by default, emails them to sign in and complete their items. Click Publish to confirm.
The Publish checklist dialog for a draft with no groups yet, where Publish is greyed out. 1 is where the groups and roles it goes to are listed. 2 Email staff, ticked by default.
For an Administrative checklist, the button and dialog say Distribute instead.
On the portal, your Point of contact is listed under Need help? An Administrative checklist has Checklist Owners instead.The editor’s Creating this checklist section suggests policies for staff to read. Each shows Added once it’s on the checklist, or lets you add it from an Assuric Document or Generate a new one.
On the Checklists screen, a checklist shows as Draft until it’s first published, then Published. In the editor, an Unpublished changes badge means staff can’t see your changes yet.
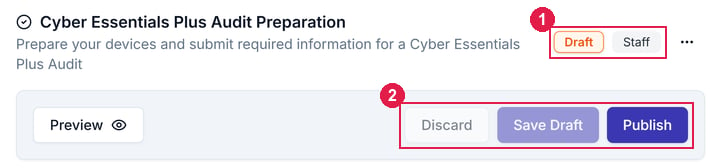
The top of a draft checklist's editor. 1 is its status and audience. 2 Discard, Save Draft and Publish. Discard and Save Draft stay greyed out until you change something.
Save Draft saves changes without publishing; Discard throws away unsaved ones.
With unsaved changes, Publish reads Save & Publish (or Save & Distribute) and does both at once.