Go to People → Staff Portal. Visit opens the portal, at app.assuric.com/staff. People with Staff portal only permission can open the portal but not the rest of Assuric.
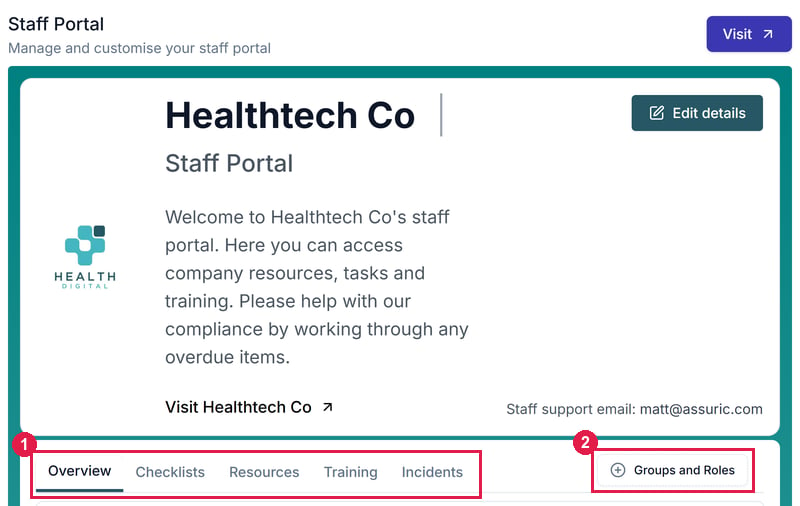
The Staff Portal screen. 1 is the five tabs. 2 Groups and Roles shows what one group or role receives.
A resource on the Resources tab stays on the version you added, so editing the document’s draft changes nothing staff see.When you approve a new version, or send a controlled document for review and approval, Republish options lists the resource under Staff portal resources, ticked by default:
Ticked: the resource moves to the new version once it’s approved.
Unticked: it keeps the old version. To move it later, use Remove from list and add the document again.
After a move:
Label and description: they don’t update, so change them with ⋯ → Edit if they mention the version. Edit can also change the assigned groups, but not the version.
Notifications: staff aren’t notified in Assuric. To have them confirm they’ve read the new version, use a checklist Resources item with Require recompletion.
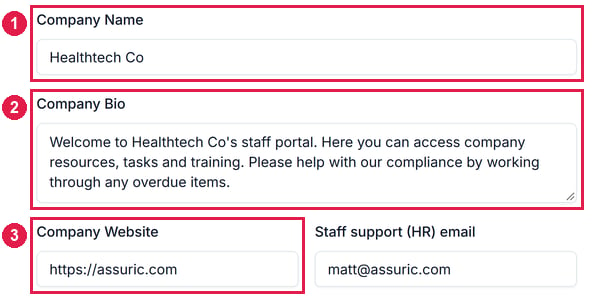
Click Edit details, then fill in Company Name, Company Bio and Company Website, which greet colleagues on the portal.
1 Company Name, 2 Company Bio and 3 Company Website.
2
Set a support contact
Add a Staff support (HR) email so colleagues know where to ask what the portal can’t answer.
The Staff support (HR) email field.
3
Choose an appearance
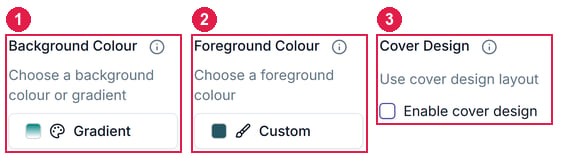
Set a Background Colour and Foreground Colour, and tick Enable cover design for a banner layout.
1 Background Colour and 2 Foreground Colour set the portal's palette. 3 Enable cover design switches to a banner layout.
4
Save
Click Update.
The Update button, at the bottom of the Edit details form. It stays greyed out until you change something.
What we recommendBefore rolling the portal out, check it from a test account with Staff portal only permission. An Admin’s own portal shows only what’s assigned to them, which is often nothing.