> ## Documentation Index
> Fetch the complete documentation index at: https://docs.assuric.com/llms.txt
> Use this file to discover all available pages before exploring further.
# Set up hazard IDs and statuses
> Choose your hazard ID pattern, and use the default statuses for hazards and controls or add your own.
**Quick summary**
* Assuric suggests each hazard's ID from the pattern your first hazard sets, so decide it before you start, especially with several products.
* Hazards and controls come with default statuses, and any status you add is available across every product.
* Name each status so it makes sense without its colour, which means nothing to an assessor reading an exported log.
## Hazard IDs
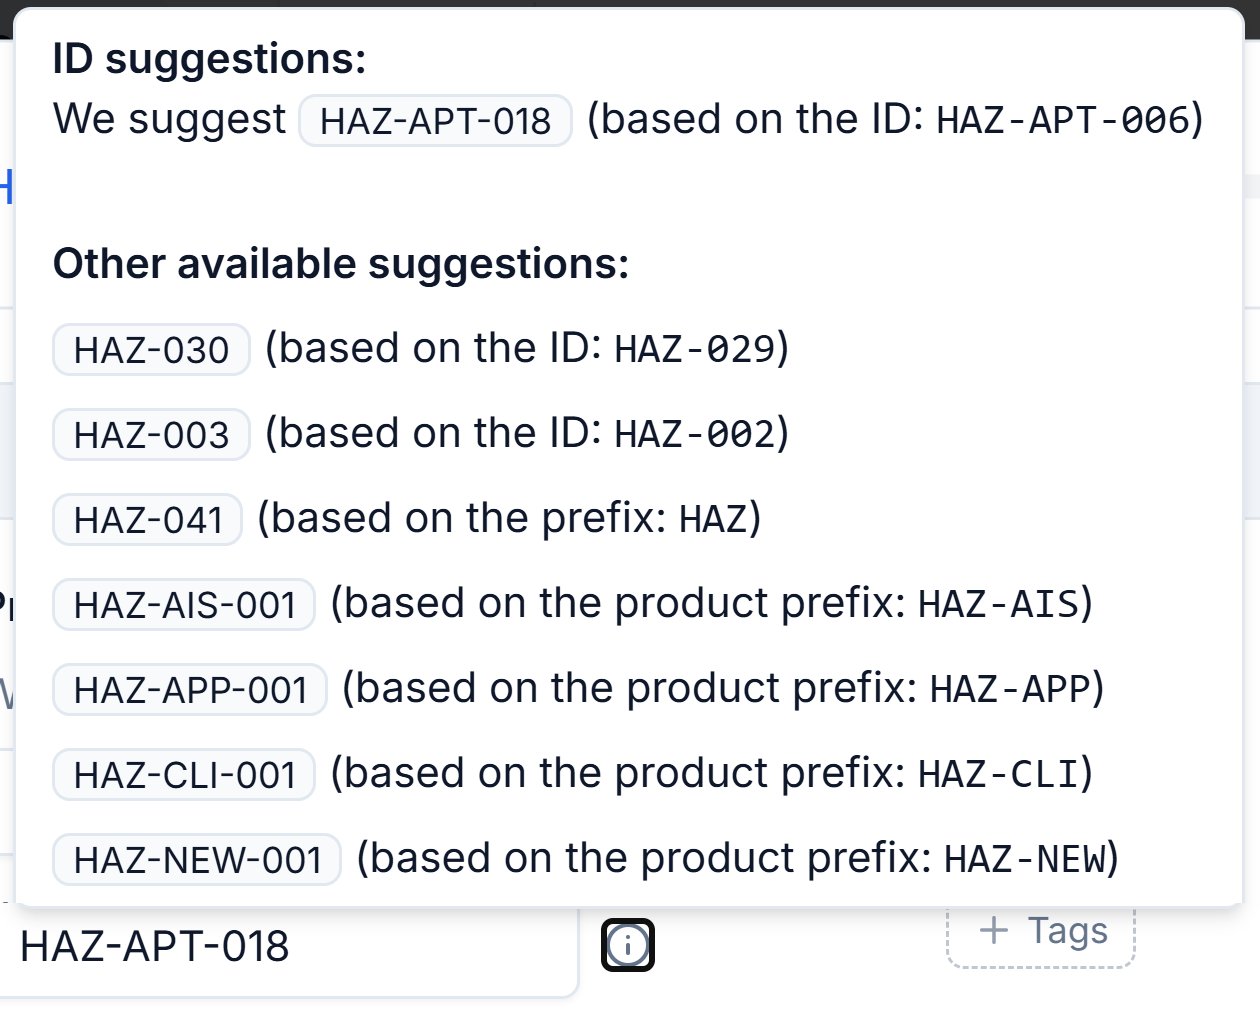
Every hazard has an ID, such as `HAZ-001`. Assuric suggests the next one when you create a hazard, and you can change it if needed.
The ID format follows the pattern your first hazard sets.
1. Give your first hazard the pattern you want, for example `HAZ-APT-001` for a product called Appointment Manager.
2. Assuric suggests the next number in that pattern.
The info icon beside *Hazard ID* lists other suggestions:
 Decide your ID pattern before you [create your first hazard](/clinical-safety/hazard-log), especially with several products.
## Statuses
Assuric's default statuses are a starting point: you can add your own to hazards and controls. Incidents have their own statuses, which you can customise too (see [Statuses](/clinical-safety/managing-incidents#statuses)).
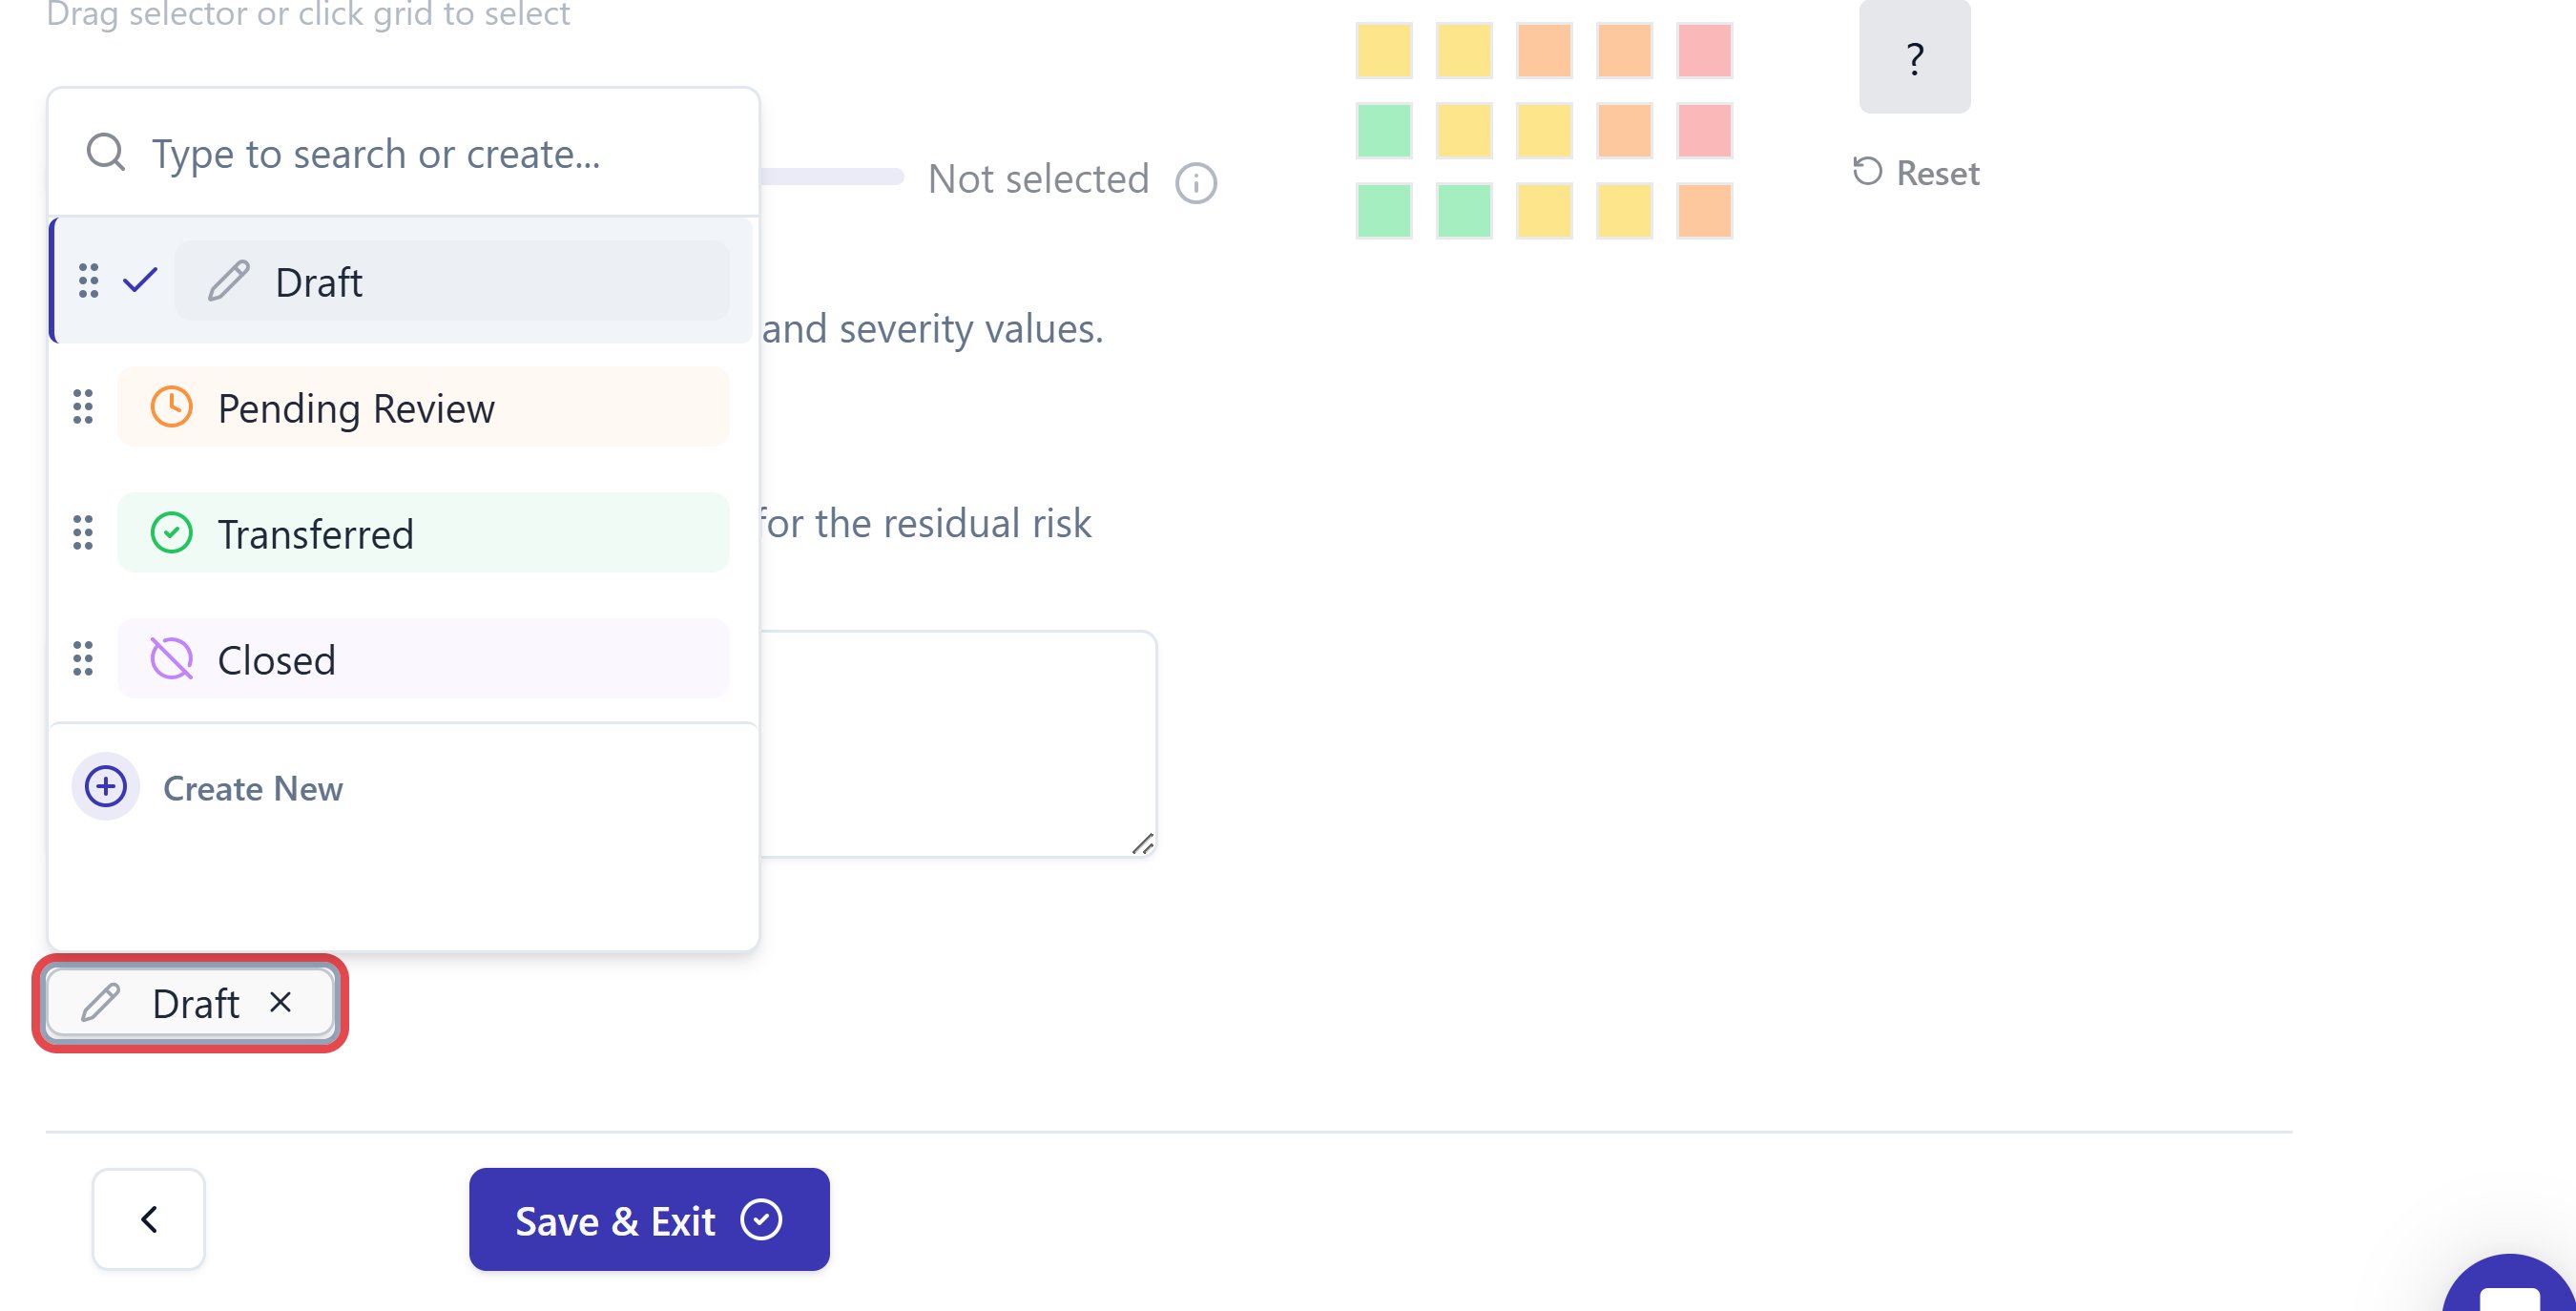
The default hazard statuses are:
| Status | Meaning |
| - | - |
| *Draft* | Still being assessed |
| *Open* | Identified and active |
| *Pending Review* | Assessment complete, awaiting sign-off |
| *Transferred* | Responsibility passed to the deploying organisation |
| *Closed* | No longer active |
Controls have their own statuses: *Awaiting Evidence* and *Done*.
To create a status:
Open a status dropdown on a hazard or a control and click **Create New**.
Name it, then pick a colour and icon from the library. Once saved, it's available across every product in your workspace.
Decide your ID pattern before you [create your first hazard](/clinical-safety/hazard-log), especially with several products.
## Statuses
Assuric's default statuses are a starting point: you can add your own to hazards and controls. Incidents have their own statuses, which you can customise too (see [Statuses](/clinical-safety/managing-incidents#statuses)).
The default hazard statuses are:
| Status | Meaning |
| - | - |
| *Draft* | Still being assessed |
| *Open* | Identified and active |
| *Pending Review* | Assessment complete, awaiting sign-off |
| *Transferred* | Responsibility passed to the deploying organisation |
| *Closed* | No longer active |
Controls have their own statuses: *Awaiting Evidence* and *Done*.
To create a status:
Open a status dropdown on a hazard or a control and click **Create New**.
Name it, then pick a colour and icon from the library. Once saved, it's available across every product in your workspace.
 Make each status name work on its own: colour means nothing to an assessor reading an exported log.
## Related articles
Add a hazard, set its ID, score it and choose its status.
How the hazard log fits together, and how to read its table.
This documentation is built and hosted on [Mintlify](https://mintlify.com), a developer documentation platform.
Make each status name work on its own: colour means nothing to an assessor reading an exported log.
## Related articles
Add a hazard, set its ID, score it and choose its status.
How the hazard log fits together, and how to read its table.
This documentation is built and hosted on [Mintlify](https://mintlify.com), a developer documentation platform.